Add or remove team members
Last updated About 2 months ago
Summary
Once your Reah account is set up, you can invite your team and assign each person the right level of access. Use this guide to invite team members to your Reah entity and remove access when it is no longer needed.
Before you start
You need Owner or Admin access to manage team members.
Invite a team member
- Click the Settings gear icon at the bottom of the left-hand navigation bar.
- Under the Entity section, select the Members tab.

- Click Invite User in the top-right corner.
- Enter the email address of the person you want to invite.
- Select their role and click Invite.
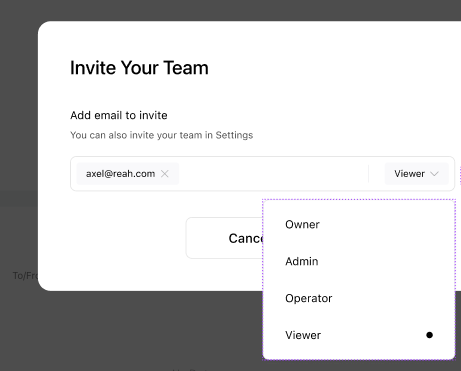
The invited user will receive an email with a link to set up their account and join your entity. You can track pending invitations from the Members tab at any time.
To invite multiple users at once, separate their email addresses with commas in step 4.
Remove a team member
- Click the Settings gear icon at the bottom of the left-hand navigation bar.
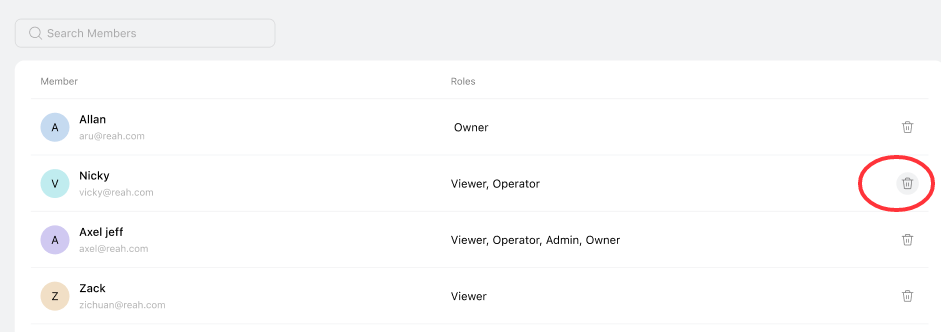
- Under the Entity section, select the Members tab.
- Find the user you want to remove and click the trash icon next to their name.
Roles and what they can do
- Owner — Full access across all modules, including permission management and entity user management. For CFOs and founders.
- Admin — Can view, edit, and report across wallet and banking accounts, transactions, and invoicing. Can configure approval flows. For controllers and VP Finance.
- Member — Can view and initiate transactions (transfers, bulk sends, asset conversions). All actions require approval based on your configured approval flows. For department heads.
- Viewer — Read-only access to all modules and dashboards. Can categorize entries and export reports. Cannot edit or move funds. For auditors, bookkeepers, and finance team members.
Key things to know
- Assign the lowest role a person needs to do their job, and upgrade only as their responsibilities grow.
- Keep the number of Admins to 1–3 to limit security exposure.
- Review your Members tab periodically and remove access for anyone who has left or no longer needs it.
- Each entity manages its own team members separately — a person added to one entity is not automatically added to others.